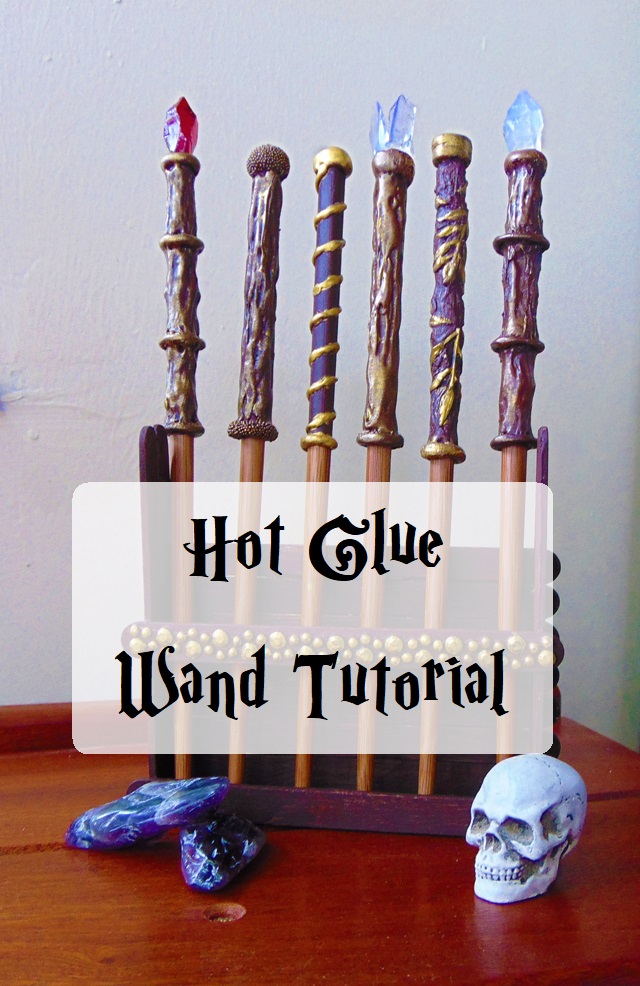
For my second Holiday Appropriate Tutorial we’ve got hot glue wands!
Fun and, if you’re in a rush, quick to make.
I first came across them when I had to quickly make up some wand examples for a woodturner after he’d been asked to make one and didn’t have the slightest idea what to do. In 50 minutes I had five wands for him, they were a bit rough, but they worked and they looked pretty good.
If you look, you’ll find a fair few tutorials on how to make these, especially on YouTube, and if you go on Etsy you’ll find ones for sale that can look quite impressive.
Mine are a little different, and, so far, I’ve not seen another tutorial on how to make them like I do. So I thought I’d share.
These are perfect for so many things – Potter parties, Halloween, Gaming props, Cosplay, or even just to use as general decor.
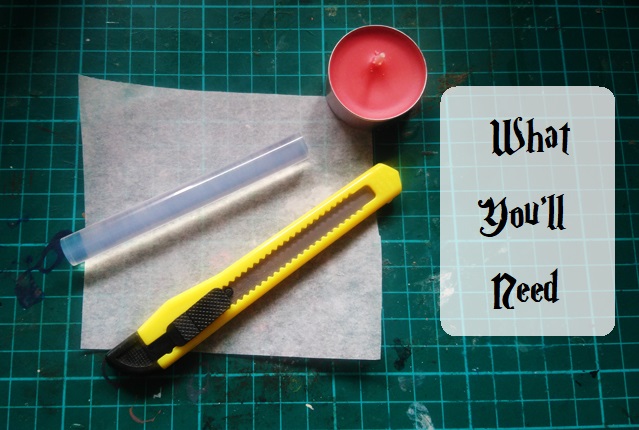
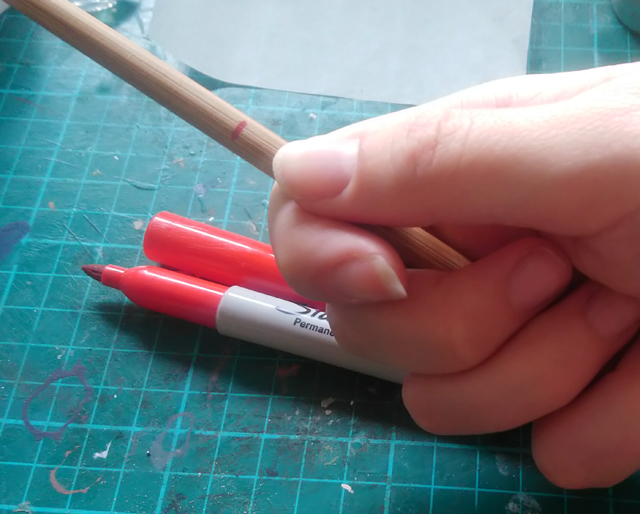
- Chopsticks/hairsticks/…sticksticks(?) (I’m using these chopsticks for this, as I like the colour…and Amazon Prime means I get them the next day, which is always a bonus)
- Hot glue gun and plenty of glue sticks
- Acrylic paint
- Large glue sticks (for making the ‘crystals’)
- Craft or Stanley knife for cutting (I use a cheap multipack from Poundland)
- Candle (trust me, it helps)
- Masking tape
- Greaseproof paper
- Nail polish (optional)
- Sand paper (optional) (I use a sanding block I got in Poundland)
- Pencil sharpener (optional)
- Spray sealant (optional)
- Other decoration – glitter, beads, etc (optional)
- Spray paint (optional)
What we’ll be doing
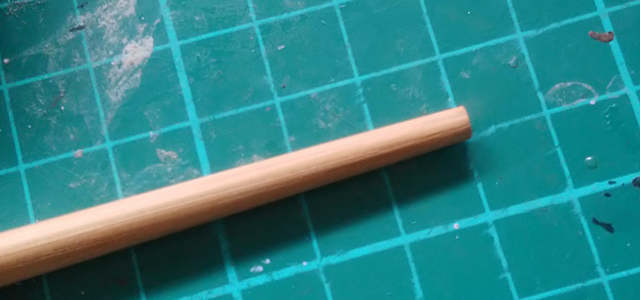
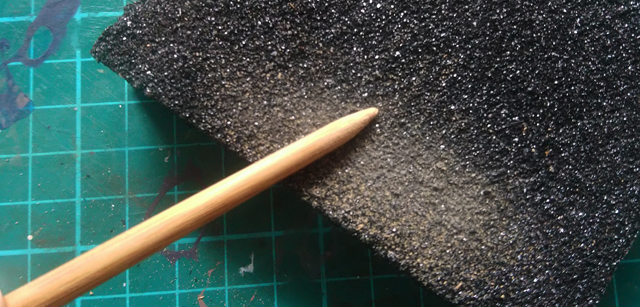
- First we’ll sort out the tip of the wand. If, like me, you’re using chopsticks then you’ll notice they have a rather flat end, which, obviously, is fine for a chopstick’s intended use, but less fine for a wand. Wands tend to be more pointy. If you’re using a hairstick then you can skip past this step and head to the next one. For stickstick users, just look at the end you want as the wand tip, if it looks alright, move on, if not then you can try this.
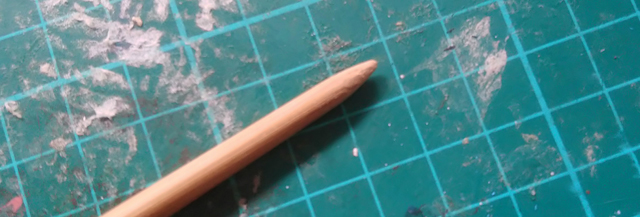
I find a sharpener helps start you off with the right shape (though it’s possible to get the shape you want without it), so stick it in there and give it a few twists. Once you’ve got your starting shape, grab some sand paper and start sanding it down to the shape you want, make sure to blunt the end a little though.
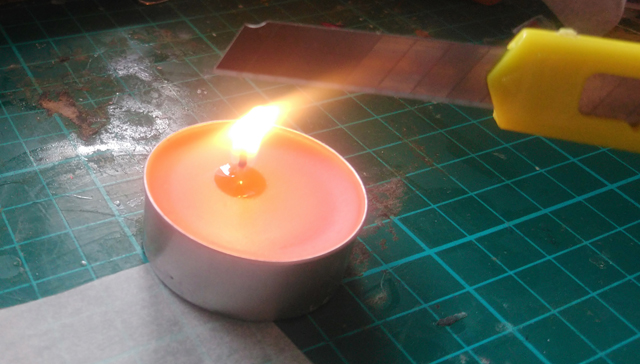
2. Make sure to give your working surface a dust off as next we’ll be making the crystals for the ends of the wands.
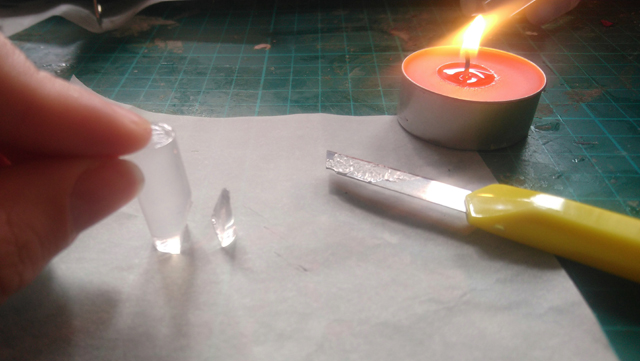
This stage uses fire to make it easier, so please be careful, alright?
Get your large glue stick, a square of greaseproof paper, a knife, and candle. Over the flame of the candle, heat the blade a bit. DO NOT put the blade into the fire, this will blacken the metal which will stain the glue. Just hold it a centimetre or two above it. After about 20 seconds try to cut your first section off your glue stick, the heat on the blade should allow it to slide through the stick without any problem, if it doesn’t slide, just heat it a bit longer. Make sure to do this on your greaseproof paper as this will prevent the melted hot glue sticking to your work surface. Also this might seem a bit silly to say but – DO NOT touch the blade to check its temperature or for any other reason.
Cut the glue stick into chunks of about 1 inch in length.
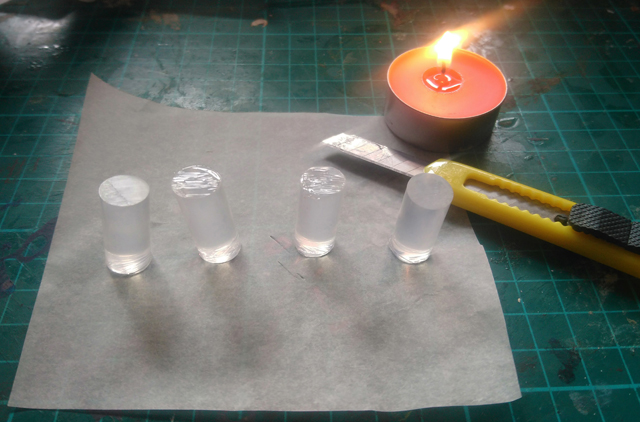
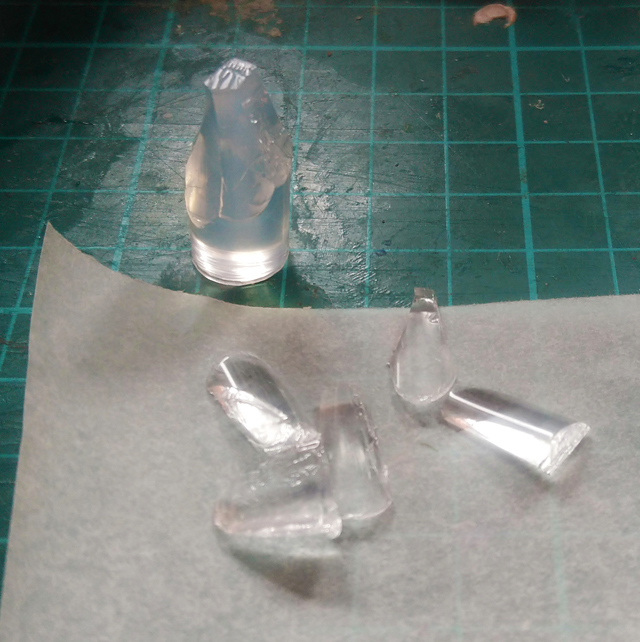
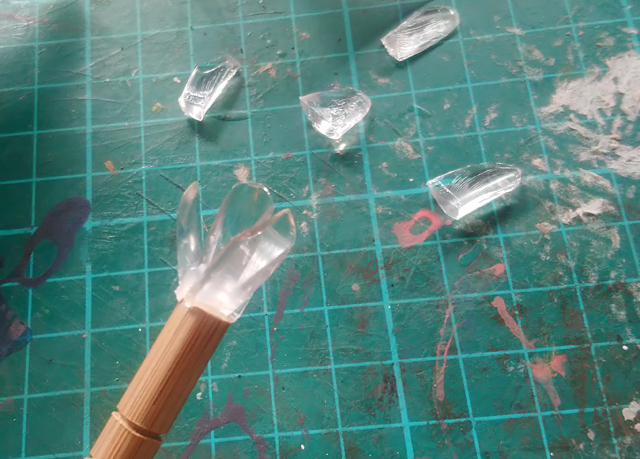
3. Take one of the chunks you’ve just sliced and, reheating your blade, start to cut off sections, starting in the middle of the chunk. The heated blade should mean you get smooth planes and crisp edges, if they’re not, then the blade isn’t hot enough. I tend to find it best to reheat after cutting each slice.
DO NOT throw away the slithers of glue that you’re taking off, keep them safe to one side as we’ll be using them again later.
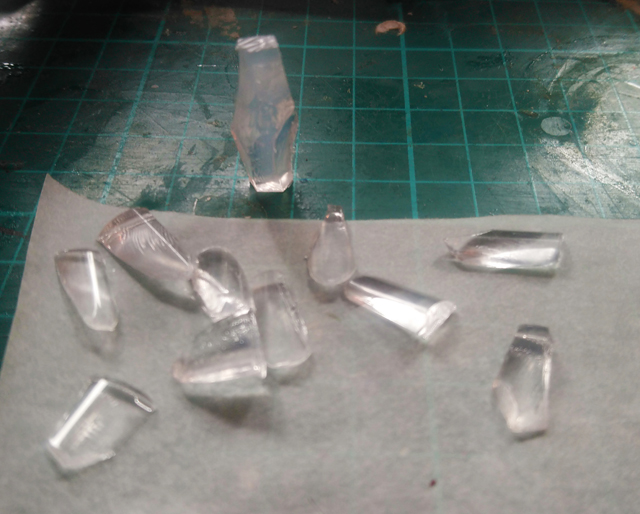
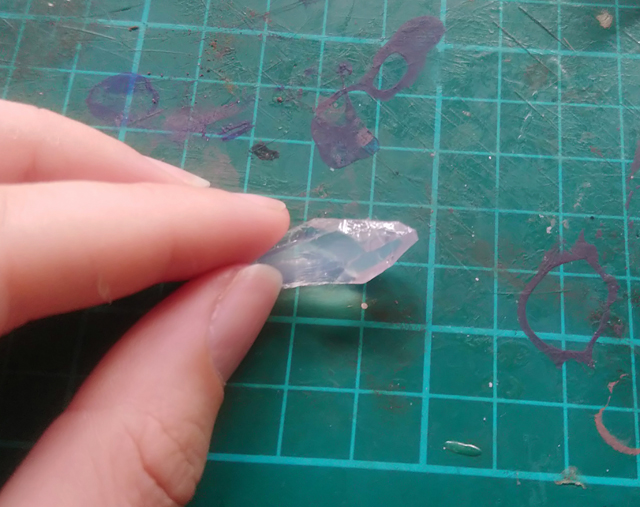
Keep going till you’re happy with the shape of your ‘crystal’.
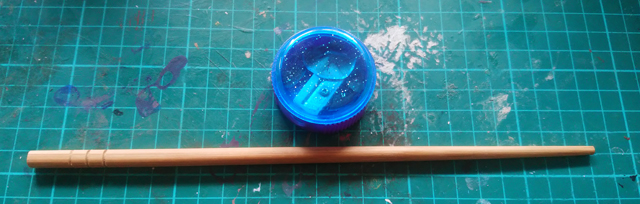
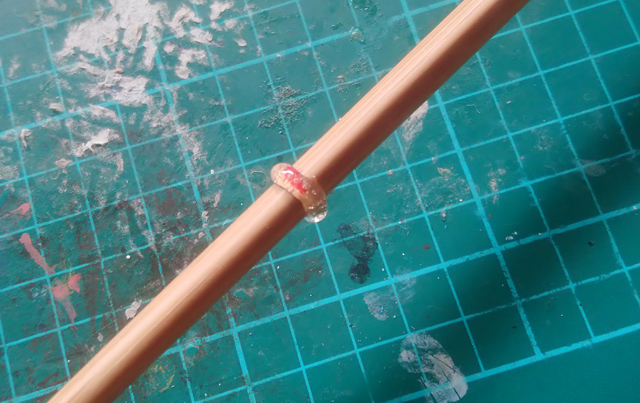
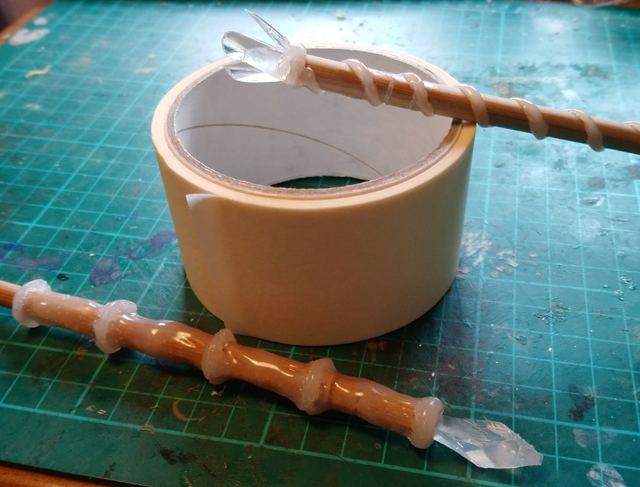
4. Next we’ll figure out how long the handle part of your wand needs to be. Grab your chopstick, and hold it as you would when it’s finished, then with a pen or pencil, mark where you want the end to be. I’m going for a slightly longer handle than I usually do for this one, so I’ve marked about 1cm away from my thumb. Don’t worry about the mark you make, we’ll be covering it with glue later. Do this for, at least, two sticks.
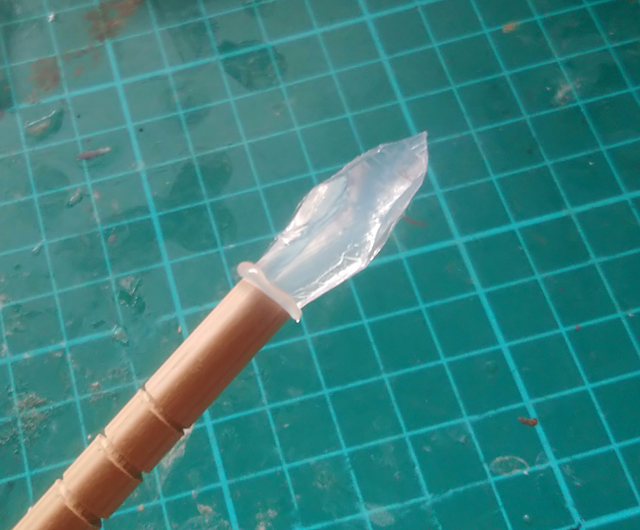
5. Now it’s time to add the ‘crystals’. Stick a bit of hot glue on the end of one of your chopsticks and press your ‘crystal’ on to it. On a second chopstick you’re going to add the slithers you cut off earlier, this gives a wonderful crystal shard effect that you see on some Wiccan wands. For this add the glue to each shard, not the stick, first, then add them till you’re happy with the formation.
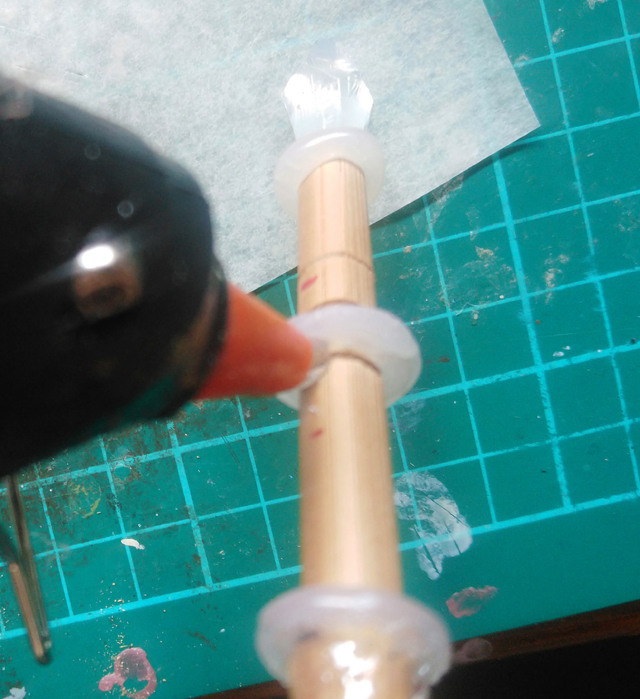
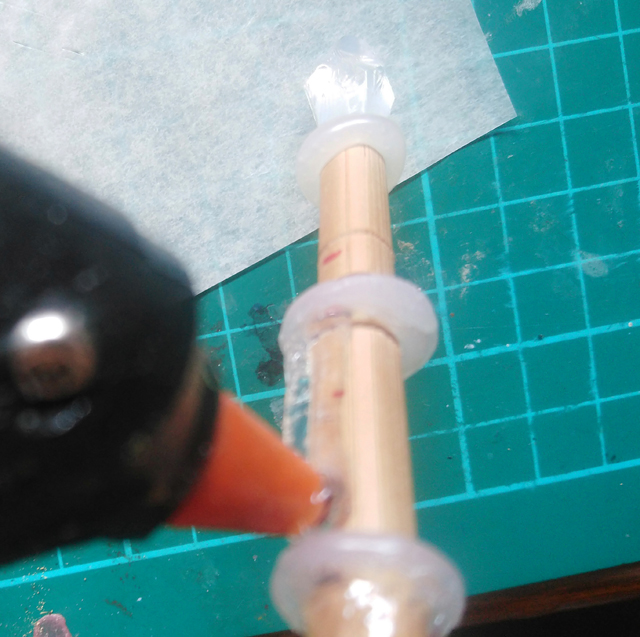
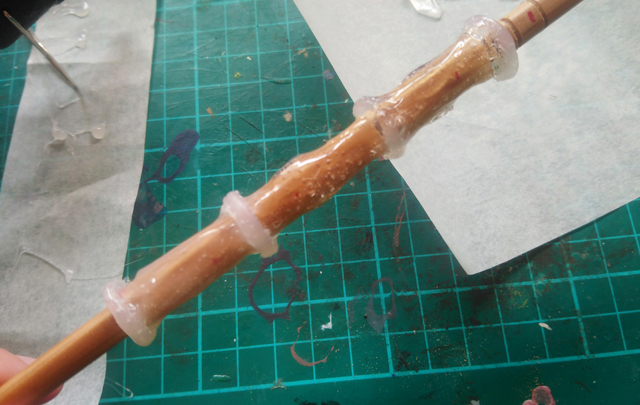
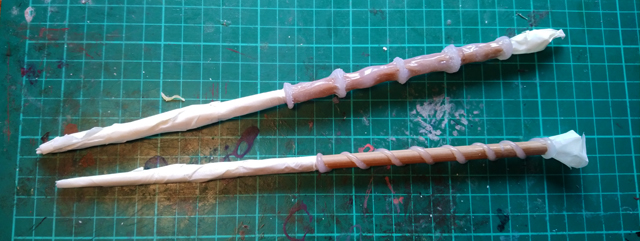
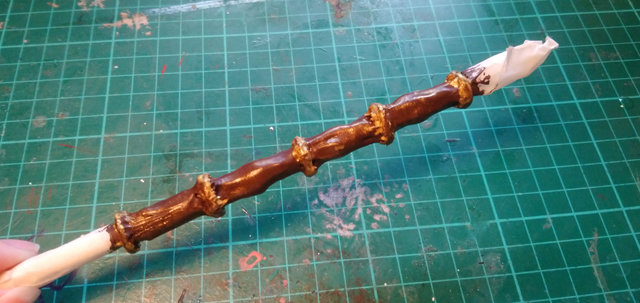
6. Time for the handle proper. Now then, I like quite simple handles so with your glue gun run a series of rings around the chopstick at about 1 inch intervals, I tend to build these up in about three layers, allowing each to dry before I add the next.
7. Once those rings have dried properly, we’ll be running glue between them. Keeping the nozzle quite close to the chopstick, run glue between two rings, going all the way around the chopstick. Once you’ve gone all the way around, keep running the glue gun nozzle over the glue to rough it up a bit, without adding more glue, this’ll give it a nice texture. Repeat this process for each gap between the rings. For the shard wand I went with a simple spiral.
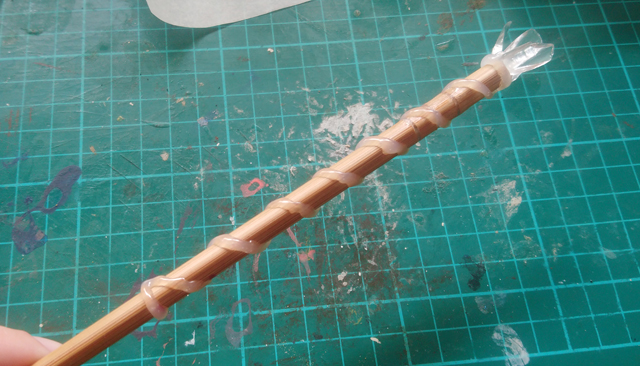
8. When the glue has set, grab your masking tape and carefully cover the wooden end of your wand and the ‘crystal’. With this done, you’re safe to paint your handle without worry.
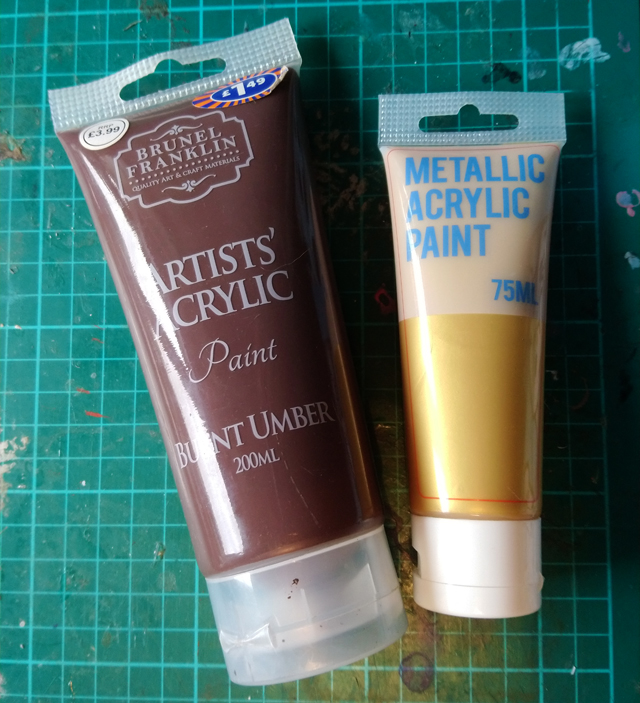
9. I’ve decided to go with brown and gold for my handle. First add your base coat, bear in mind that if you don’t prime it/give it a base coat with spray paint first then you’ll need a few coats of this to get the coverage you want. I’m using simple acrylic paints I picked up in B&M and Poundland, they seem to do the trick with a couple of coats.
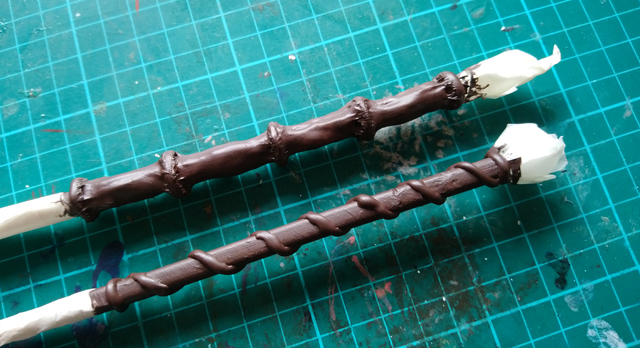
10. Once the main colour is dry, I dry brush with the gold, adding a bit more to the rings to make them stand out.
11. With the paint dry, it’s safe to take off the masking tape and add a few finishing touches. Decide what kind of crystal you want, then grab a nail varnish that’ll match. For quartz, just add a layer of clear polish, for rubies add red, emerald add green, etc, etc, etc. Nail varnish is better than paint for this as it retains a certain transparency, and adds a nice shine. When that’s dry you can also give the whole thing a spray with a clear sealant to protect it and take away any tackiness the paint or glue has kept.

And there you have it, a wonderful wand with a powerful crystal. Using a glue stick also makes the crystals relatively child friendly too as they can’t hurt themselves on them, especially on the shards as they’re not sharp, even if they look it, and they bend and flex if you press on them. Perfect for the accident prone, like me, too.
They’re so easy to customise too. Add beads, artificial leaves, or even just play around with glue designs. Just add it before the paint for some interesting textures, or after for some colour and sparkle.
Happy wand making!